Introduction to Game Boy Modding
The practice of modding the original Game Boy has gained significant traction within the gaming community, transforming it from a nostalgic handheld device to a highly individualized gaming experience. Modding encompasses a variety of enhancements and modifications aimed at improving the functionality and aesthetics of the device. Among the most sought-after upgrades is the installation of an IPS (In-Plane Switching) backlit screen, which drastically enhances the visual output.
The original Game Boy, while beloved for its portability and classic game library, has limitations in terms of screen brightness and display quality. Those enamored with retro gaming often find themselves navigating the challenges posed by the original LCD screen, particularly in low-light environments. This limitation has resulted in a growing interest in modding, as enthusiasts seek to address these shortcomings. The IPS backlit screen not only offers better contrast and color reproduction but also allows for comfortable gameplay in various lighting conditions.
Part of the appeal of modding lies in the ability for collectors and gamers to personalize their devices. Each modded Game Boy can reflect the owner’s unique preferences, incorporating colors and features that resonate personally. Additionally, the act of modding fosters a sense of community among players who share tips and modifications on platforms dedicated to this hobby. This trend has made modding a transformative experience for many, allowing them to breathe new life into their beloved devices.
As we delve deeper into the specific procedures for upgrading the Game Boy to accommodate an IPS backlit screen, it becomes evident that understanding the fundamental aspects of modding is essential. Each step of this process will equip enthusiasts with the knowledge necessary to successfully perform the mod and to enjoy the enhanced gameplay that an IPS display provides.
Gathering the Required Materials and Tools
Modifying your original Game Boy with a backlit IPS screen is an exciting project for enthusiasts looking to enhance their gaming experience. Before diving into the installation process, it is crucial to gather all the necessary materials and tools to ensure a smooth and successful modding journey.
First and foremost, you will need the specific IPS screen designed for the Game Boy. One popular option is the IPS LCD screen kit compatible with the original Game Boy, which includes the screen itself and a customized front glass lens. This upgrade provides a clearer and brighter display, allowing for an improved gaming experience.
In addition to the screen, you will want to have the following tools on hand: a precision screwdriver set, which is essential for removing the screws on your Game Boy; a soldering iron, which will be necessary for making delicate solder connections; and solder wire to facilitate electrical connections. Having wire cutters and a pair of tweezers will also help in handling small components during the installation process.
Other components that might be required include a battery adapter for the new screen, adhesive strips for securing the screen in place, and possibly a multimeter for testing connections when necessary. It's advisable to work in a well-lit area and consider using an anti-static wrist strap to protect your device from electrostatic discharge.
By gathering these materials and tools beforehand, you’ll be prepared to take on the modding project with ease and confidence, ensuring that the transformation of your Game Boy is both efficient and rewarding.
Preparing Your Game Boy for Modding
Before you can begin the modding process, it is crucial to prepare your original Game Boy appropriately. This preparation phase ensures that the disassembly and subsequent modifications are carried out safely and efficiently.
Start by gathering all the necessary tools and materials. You will need a precision screwdriver set, a plastic opening tool, and, ideally, an anti-static wrist strap to prevent any damage to sensitive components. It's also advisable to have a clean, well-lit workspace where you can easily access and organize the parts.
Next, power down your Game Boy and remove any batteries. This step is vital to prevent any electrical hazards during disassembly. Carefully use the appropriate screwdriver to remove the screws on the back of the console. Keep these screws in a small container to avoid losing them during the modding process. Once the screws are removed, use a plastic opening tool to gently pry the back cover off, minimizing the risk of damaging the casing.
With the cover removed, you should now be able to see the internal components of your Game Boy. It is essential to handle these components with care, as they are delicate and can be easily damaged. Take your time to familiarize yourself with the layout of the parts. If you are unsure of any specific component's function, consult a schematic to avoid confusion.
Lastly, ensure that your workspace remains free of any clutter that could interfere with your project. Taking these safety precautions and ensuring everything is organized will streamline the modding process, enabling you to proceed with confidence as you install the new backlit IPS screen.
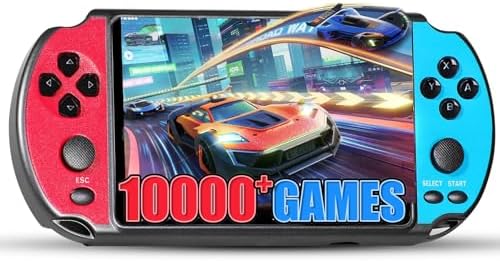
- 10,000+ Preloaded Games – 10+ emulators (adventure/action/racing). Authentic retro play, instant start.
- 5.1" HD Display – Crystal-clear visuals, wide angles. Immersive gaming anywhere.
- 1800mAh Battery (5hr Playtime) – Non-stop play for commutes/travel/home.
Installing the IPS Backlit Screen
Installing an IPS backlit screen into your original Game Boy can significantly enhance your gaming experience by providing a brighter and sharper display. This guide will walk you through each step of the installation process. Begin by gathering the necessary tools and materials. You will need a Phillips screwdriver, a tri-wing screwdriver, a soldering iron, solder, and the IPS backlit screen kit, which typically includes the screen, the ribbon cable, and a new lens.
First, ensure your Game Boy is powered off and remove the battery. Using the tri-wing screwdriver, carefully unscrew the back casing of the device. Once the screws are removed, gently lift the case away from the main body, exposing the internal components.
Next, locate the original LCD screen. There will be a ribbon cable connecting it to the motherboard. Carefully detach this cable by pulling it straight out, without applying excess force. Once the original screen is removed, position the new IPS display into place. Align the ribbon cable with the connector on the motherboard, ensuring it is securely inserted.
To ensure your new screen fits snugly, you may need to use small strips of double-sided tape to secure it. Gently press the screen down and verify that it is resting properly by checking for any gaps along the perimeter. At this point, if your IPS screen kit includes modifications such as a backlight, ensure that you connect any additional cables or wires as outlined in the manufacturer’s instructions.
If soldering is required (depending on the specific IPS screen model), follow the included guide carefully to connect the necessary wires. Make sure to heat the soldering iron to the appropriate temperature, and apply solder only where required to avoid damaging any nearby components. Finally, reassemble your Game Boy by reversing the disassembly steps, taking care to reinsert all screws securely.
Once completed, power on your Game Boy and enjoy the improved visuals with the new IPS backlit screen. The result of this upgrade should provide you with a superior gaming experience, making old classics enjoyable once again.

- Flags, Capitals & Locations - Show the country on the map, recognize the flags or name the capital city. All 194 countri...
- Family Friendly Game - Find the strongest fact about the country and win. Train your memory and brain while having fun.
- Made for Kids & Adults - For all stages of knowledge. One of the best educational board games for kids 8-12. Smart birth...
Testing Your Modifications
Once you have successfully installed the backlit IPS screen in your Original Game Boy, it is crucial to proceed to the testing phase to ensure that everything is functioning properly. Begin by reassembling your Game Boy, making sure all screws and components are securely in place. Then, power on your device by pressing the power button. If the screen illuminates and displays a menu or the startup screen, this indicates that the installation was successful.
Next, conduct a thorough examination of the screen. Check for any dead pixels, irregular lighting, or color discrepancies. These issues might indicate that the wiring is improperly connected or that the screen itself has defects. Additionally, assess the brightness control feature if your IPS screen supports different brightness levels. Adjust the brightness and observe if the transitions are smooth and the screen responds appropriately.
In the event that the screen does not power on, first confirm that the battery is functioning. Replace the batteries or connect the Game Boy to a power source to eliminate the possibility of low power supply. If it still fails to start, double-check all connections you made during the installation process for soldering errors or loose wires. Consult the screen’s installation guide or online forums for troubleshooting tips regarding specific issues related to your model.
Lastly, if the Game Boy powers on but the screen remains blank or displays distorted graphics, it could suggest a need for further adjustments. Consider re-soldering connections, verifying the correct orientation of the screen, or replacing the screen if necessary. Proper testing after modification is essential to enjoy your enhanced gaming experience with the new backlit IPS screen.
Finalizing the Mod and Reassembly
After successfully integrating the backlit IPS screen into your Original Game Boy, the final step involves reassembly and ensuring the device is securely put back together. This finalization process is crucial as it protects the modified screen and guarantees that all internal components are correctly positioned.
Begin by carefully placing the IPS screen assembly back into the front case of the Game Boy. Ensure all edges of the screen are aligned properly within the casing. It is advisable to perform a visual inspection of the connection points between the screen and the motherboard, confirming that the flex cable is seated properly and not pinched or damaged.
Before reattaching the front and back halves of the casing, power on the device to verify that the IPS screen functions correctly. This step is beneficial as it allows you to check for any visual anomalies or issues that may arise post-installation. If the screen lights up and displays as expected, proceed to the next step.
When reassembling the Game Boy, begin by aligning the two halves and gently pressing them together. It is important to avoid using excessive force, as this could lead to damage to your new screen. Ensure that no wires or cables are caught between the two halves, as this could affect functionality.
Once aligned, carefully replace the screws, securing the back case to the front. Use a cross-functional screwdriver that fits the screws appropriately to avoid stripping them. Tighten the screws gently; over-tightening may lead to flexing of the casing, potentially damaging the screen.
In conclusion, double-check everything to confirm that the reassembly is flawless before powering on the device for the final test. With careful attention to the assembly process, your modded Game Boy will not only look visually appealing but will also function optimally, providing an enhanced gaming experience with the new IPS screen.
Gameplay Experience: Before and After
The original Game Boy, released in 1989, set the foundation for portable gaming. However, its monochrome screen and lack of backlighting presented significant challenges for gamers. The dim display made it difficult to enjoy games in low-light conditions, often forcing players to seek external light sources to adequately see the screen. This limitation not only hindered gameplay but also affected the overall user experience, often leading to eye strain and discomfort during extended sessions.
The modding process, particularly the installation of a backlit IPS screen, transforms the gameplay experience dramatically. With vibrant colors and improved contrast, the backlit display illuminates the screen evenly, allowing for clearer visibility in various lighting conditions. Gamers can now enjoy their favorite titles without the need for external lighting, resulting in a more comfortable and immersive experience. The enhanced resolution offered by the IPS technology elevates the visual quality, making sprites and backgrounds more distinct and enjoyable.
Feedback from the gaming community highlights the significant improvements brought about by this mod. Many users commend the ability to play classics like "Tetris" and "The Legend of Zelda: Link's Awakening" without the constraints of poor lighting. Additionally, forums are filled with discussions praising the mod's capability to breathe new life into aging hardware, showcasing how a simple upgrade can revitalize a cherished gaming device. The contrast in gameplay experience before and after implementing the mod is profound, as players can now enjoy a full spectrum of gaming possibilities, all thanks to modern technology.

Maintenance Tips for Your Modded Game Boy
Ensuring the longevity and optimal performance of your modded Game Boy is essential, especially after enhancing it with a backlit IPS screen. Regular maintenance will not only provide a better gaming experience but also prolong the life of your device. Below are some practical tips to help you maintain your modded Game Boy effectively.
Firstly, keeping the screen clean is crucial. Use a microfiber cloth to gently wipe the screen, avoiding any harsh chemicals that could damage the screen's coating. For stubborn smudges, a slightly dampened cloth with water can be used. It is important never to spray any liquid directly onto the screen; instead, apply it to the cloth first. Regular cleaning will prevent dust and fingerprints from hindering your gameplay experience.
Battery maintenance is another key aspect of your modded Game Boy’s upkeep. If your device uses rechargeable batteries, always charge them according to the manufacturer's guidelines. Avoid overcharging, as this can shorten battery life. For older Game Boy models with standard batteries, consider investing in high-quality batteries or even a rechargeable battery pack to reduce the frequency of replacements. Regularly check the battery contacts for corrosion and clean them with a cotton swab dipped in isopropyl alcohol when necessary.
Lastly, proper storage is vital for your Game Boy’s durability. When not in use, store it in a cool, dry place to protect it from moisture and extreme temperatures. Using a protective case can help shield the device from physical damage. Furthermore, avoid leaving your Game Boy in direct sunlight, as prolonged exposure can damage the components, especially the screen.
By following these maintenance tips, your modded Game Boy will stay in excellent condition, providing countless hours of nostalgic gameplay with its enhanced display.

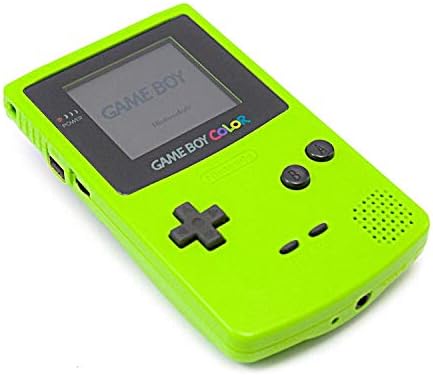
- Game Boy Color is the latest addition to the world's most popular line of hand-held gaming systems.
- 52 brilliant colours simultaneously displayed on Game Boy Color's small portable screen.
- Full colour portable gaming is an awesome advance.
Conclusion and Final Thoughts
In summary, installing a backlit IPS screen in your original Game Boy is a transformative experience that significantly enhances gameplay. The benefits of this mod are numerous. Not only does it provide improved visibility in various lighting conditions, but it also revitalizes the visual aesthetics of classic games. An IPS screen offers wider viewing angles and richer colors, which can greatly enhance your gaming sessions. This small upgrade can breathe new life into an iconic device, allowing both new players and nostalgic gamers to enjoy their favorite titles in a way that was previously thought impossible.
Moreover, undertaking this upgrade fosters a deeper connection to the device, as it encourages a hands-on approach to gaming hardware. By engaging in the modding process, you not only gain a deeper appreciation for the Game Boy's history but also develop valuable skills that can be applied to future tech projects. The modding community provides ample resources and support that can guide even novices through the technical aspects of the modification.
For those looking to further enhance their Game Boy experience, consider exploring additional upgrades such as improved sound systems or custom shell designs to complement the new display. Other popular mods include adding rechargeable batteries or employing custom firmware that allows for a broader range of game compatibility. Each enhancement offers its unique set of advantages, ensuring that your Game Boy not only retains its nostalgic charm but also meets modern standards in gaming performance.
Ultimately, the backlit IPS screen mod is more than just an upgrade; it is an invitation to explore an expansive world of customization and creativity within the beloved realm of retro gaming. We encourage you to take the leap and try it for yourself, as the rewards are sure to enhance your gaming experiences while preserving a cherished piece of gaming history.


0 Comments