Introduction to Cleaning Old Game Cartridges
Maintaining old game cartridges is crucial for preserving both their functionality and historical significance. Over time, these cartridges can accumulate dirt, dust, and grime, potentially impacting their performance. As collectors and gamers increasingly seek to keep their vintage gaming systems operational, understanding the importance of proper cleaning techniques becomes paramount. Dirt accumulation not only affects the exterior appearance of the cartridges but can also hinder the connection between the cartridge and the console, leading to unresponsive gameplay or even damage.
One of the common issues associated with old game cartridges is oxidation, particularly on the internal pins that facilitate the transfer of data between the cartridge and the gaming console. When these pins become oxidized, the electrical connection needed for successful game loading is compromised. Cleaning these components requires a delicate approach to avoid damaging the pins, which are often made from materials sensitive to harsh cleaning agents. Gentle cleaning methods can help restore functionality while ensuring the physical integrity of the cartridge remains intact.

- Massive Preloaded Retro Game Library: Relive the golden era of gaming with an enormous built-in collection of over 40,00...
- Includes Two 2.4G Wireless Controllers: Jump straight into shared gaming action with two ergonomic wireless controllers ...
- Vibrant 4K HDMI Upscaling & Simple Setup: Connect directly to your modern TV via HDMI for instant plug-and-play enjoymen...
In addition to physical cleanliness, preserving the longevity of old game cartridges involves controlling the environment in which they are stored. High humidity and fluctuating temperatures can exacerbate the degradation of materials within the cartridges. Regular inspection and cleaning can mitigate the buildup of contaminants that contribute to performance issues. By investing time into maintaining these relics of gaming history, collectors and enthusiasts are not only ensuring they can be enjoyed for years to come but also safeguarding the memories and experiences they embody.
What You’ll Need for the Cleaning Process
To efficiently clean old game cartridges while ensuring the safety of their internal components, it is crucial to gather the appropriate materials and tools. This preparation can significantly enhance the cleaning process and prevent damage.
First and foremost, isopropyl alcohol is an essential item for cleaning the cart's exterior and interior metal contacts. A strength of 70% is recommended as it effectively removes grime without being overly aggressive. It evaporates quickly, minimizing the risk of moisture damage.
Cotton swabs are also necessary, as they provide a gentle yet effective means of applying the isopropyl alcohol to the delicate pin connectors inside the cartridge. Their fine tips make it easier to reach tight spaces without risking scratches or harm.
A soft cloth is advisable for wiping down the outside surfaces of the cartridges. Microfiber cloths are particularly beneficial as they reduce the likelihood of scratching and can attract dust and dirt particles with minimal effort. This step ensures that your cartridges not only function properly but also look their best.
Additionally, screwdrivers, often with a security tip design, may be required for opening certain cartridges to access the internal components. Ensure you have the right size and type, as this will help prevent stripping the screws, allowing for a smooth opening during the cleaning process.
Finally, a vacuum cleaner with a brush attachment can assist in removing dust from the cartridge compartments before cleaning. It is best to use a low-powered setting to avoid damaging any internal parts. Collectively, these tools and materials contribute significantly to the safe and effective cleaning of old game cartridges.
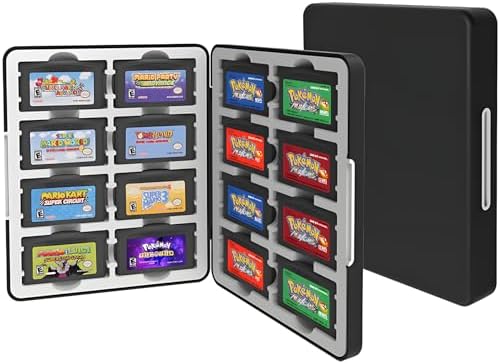
- Perfect Storage for GBA Games – Keep your cartridges neatly organized and protected. This case holds up to 16 GBA games,...
- Soft Silicone Interior Slots – Each cartridge fits snugly into its custom silicone insert, preventing movement and scrat...
- Strong Magnetic Closure – Features a secure magnetic clasp that keeps your case shut tight during travel. Even when turn...
Safety Precautions Before You Start
Before embarking on the process of cleaning old game cartridges, it is crucial to establish a safe environment to avoid damaging the cartridges or causing harm to yourself. First and foremost, ensure that all cartridges are unplugged from any gaming console or device. This eliminates the risk of electrical shock or damage to the console during the cleaning procedure.
Next, set up your workspace on a clean, flat surface that is free from clutter. This reduces the chances of accidentally dropping or misplacing small components during the cleaning process. A well-organized area will allow for better focus and efficiency, ensuring that all cleaning tools and the cartridges themselves are easily accessible.
Moreover, it is advisable to wear protective gloves while handling the cartridges. This not only protects your hands from any chemicals or residue from previous use but also prevents oils from your skin from coming into contact with sensitive surfaces. Additionally, using anti-static wrist straps can help prevent static electricity from damaging the internal pins of the cartridges.
Ensure that you have the proper tools and cleaning materials on hand. Using appropriate cleaning solutions designed for electronics is vital; harsh chemicals can cause more harm than good. Isopropyl alcohol with a concentration of at least 70% is often recommended for cleaning electronic components. Have cotton swabs or soft cloths available for detailed cleaning to avoid scratching the surface.
Finally, maintain adequate ventilation in your workspace if you are using solvents or cleaning agents. This helps to avoid inhaling harmful vapors that may be released during the cleaning process. By following these safety precautions, you will set a solid foundation for cleaning your old game cartridges effectively without risking damage.
Step-by-Step Guide to Opening Game Cartridges
Opening old game cartridges is a delicate task that requires careful handling to prevent damage to the plastic casing and internal components. Following a systematic approach will help ensure that the process is done safely.
First, gather the necessary tools: a small Phillips screwdriver, a flat-head screwdriver, and a plastic spudger. It is vital to use the correct tools to avoid stripping screws or damaging the casing.
Begin by identifying the type of game cartridge you are working with. There are various designs, including those for consoles like the Nintendo Entertainment System (NES), Super Nintendo, and Sega Genesis. Each may have screws located in different places or require specific approaches to open.
For example, start with the NES cartridge, which typically has a pair of small, visible screws on the bottom. These screws should be removed using the Phillips screwdriver, ensuring that you keep them in a safe place to avoid losing them. Once the screws are out, gently pry the half casings apart using a plastic spudger. The spudger is less likely to scratch the plastic compared to a metal tool.
In the case of a Super Nintendo cartridge, the process is quite similar. However, these cartridges often feature a security screw. For this, a specialized security screwdriver may be required. Ensure to apply even pressure when prying the casing apart to avoid any cracks or breakage.
Once opened, handle the internal components with care, as they are sensitive to static electricity and physical damage. It is advisable to wear anti-static gloves and be mindful of any internal connectors or pins. After cleaning, the reassembly of the cartridge should be done in reverse order, ensuring that everything fits snugly without forcing fit, which could damage the plastic.
This step-by-step guide provides a basic framework for safely opening various game cartridges while protecting the delicate components inside. Each type of cartridge may present unique challenges; therefore, adapt your approach accordingly for the best results.

- 208 in 1 DS Game, Super Combo Game Cartridge Contains 208 3ds Games, Retro Game Pack Card Suitable for NDS, NDSi, 3DS, N...
- Wide Compatibility: Compatible with NDS, NDSi, NDSL, NDSi XL, 3DS, 3DS XL, New 3DS, New 3DS XL, 2DS, 2DS XL, etc.
- Plug and Play: Insert the SD card into the game cartridge and install your favorite games into the console.
Cleaning the Exterior of the Cartridge
Cleaning the exterior of old game cartridges is essential for preservation and for ensuring proper handling. Over time, cartridges can accumulate dust, grime, and even adhesive residues from stickers. As such, the selection of appropriate cleaning agents and techniques is crucial to avoid any potential damage.
To begin, a soft, lint-free microfiber cloth is recommended for dusting. This type of cloth is effective at capturing dirt without scratching the surface of the cartridge. Avoid using paper towels or rough fabrics, as they can cause micro-abrasions that dull the finish over time.
For general cleaning, a solution of distilled water and isopropyl alcohol (at least 70% concentration) can be used. Dampen the microfiber cloth with this mixture, ensuring it is not soaking wet, to prevent any excess liquid from seeping into the cartridge's openings. Gently wipe the outer casing, using circular motions to lift away any grime. Be cautious around any labels, as wetter mixtures may compromise adhesive properties.
In addition, for sticky residues from price labels or tapes, a few drops of olive oil or commercial adhesive remover can be effective. Apply the substance onto the cloth rather than directly onto the cartridge to maintain control and reduce the risk of over-saturation. After the initial cleaning, it is advisable to follow up with the alcohol solution again to ensure that any remaining oily residue is removed.
Finally, once the exterior is clean, allow the cartridge to dry completely before handling or storing it. This method will help maintain the game cartridge's condition while ensuring that it remains functional for future use.
Cleaning the Internal Pins Safely
Cleaning the internal contacts or pins of old game cartridges requires a careful approach to avoid any potential damage. These connections are critical for ensuring the game cartridge works correctly with the console. Therefore, using the right materials and methods is essential for achieving a thorough and safe clean.
The first step in cleaning the internal pins is to gather the appropriate materials. Isopropyl alcohol, particularly with a concentration of 90% or higher, is effective for this task. It evaporates quickly without leaving any residue, which minimizes the risk of corrosion or further damage to the pins. Furthermore, using conductive cleaning solvents specifically designed for electronic components may be beneficial as they can ensure optimal conductivity, restoring the connections to their original functionality.
When it comes to cleaning, it is vital to avoid any abrasive materials such as sandpaper, steel wool, or scour pads. These can scratch the delicate surface of the pins, causing irreparable damage and impairing their ability to connect effectively. Instead, a soft cloth or a cotton swab should be employed. Dampen the cloth or swab lightly with isopropyl alcohol or the conductive solvent, ensuring it is not overly saturated, to prevent any dripping inside the cartridge.
Gently wipe the internal pins using a circular motion, allowing the cleaning solution to do the work without exerting too much pressure. Rinse and repeat if necessary, ensuring to use a clean section of the cloth or a new swab each time. Once the pins have been cleaned, it is advisable to let them air dry completely before re-inserting the cartridge into the console. This precaution helps to avoid any moisture-related issues that could arise from using the cartridge while still damp.
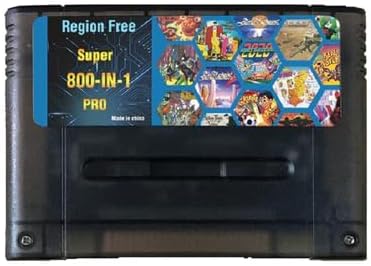
- This is EUR PAL version multi-Games for SNES. Works Perfectly in Game Console Retron 3-5. Retro Trio and Other Classic R...
- 1G bits large capacity game cartridge. English language. RPG game can be independently saved data & Action game do not n...
- Most of games only work on PAL format game console, so if your console is Japan(NTSC) version console, your game console...
Reassembling the Cartridge After Cleaning
Once you have completed the cleaning process of your old game cartridge, the next essential step is to reassemble it correctly. This stage is crucial, as improper assembly can lead to potential damage to the cartridge or hinder its functionality. Begin by gathering all components of the cartridge—this includes the shell, the circuit board, and any screws that may have been removed during the cleaning.
Begin reassembly by carefully placing the circuit board back inside the shell. Ensure that it is oriented correctly, usually marked by a specific shape or guide on the cartridge shell. Take extra care to avoid bending or crushing any components, especially the internal pins, as they are delicate and crucial for performance. You may want to tilt the cartridge slightly to facilitate the placement of the circuit board without forcing it into the shell.
Next, check that all connectors are aligned properly. The cartridge should slide together smoothly if you have performed the cleaning correctly. Once everything appears to be in its proper place, gently press the halves of the shell together. Look for any signs of misalignment—if things do not fit together easily, it may indicate that an internal component is not seated properly.
Now, it is time to secure the cartridge. Using the screws that you previously removed, begin fastening them back into their designated positions. It is prudent to start with the screws at the edges and then progress to the center, as this method ensures even pressure on the cartridge. Tighten each screw gently; overtightening could strip the threads or crack the casing. Once all screws are securely in place, perform a final inspection to confirm that there are no gaps or loose parts, ensuring that the cartridge is ready for use once again.
Testing the Cartridges Post-Cleaning
Once the cleaning process for old game cartridges has been completed, it is essential to test the cartridges to confirm they are functioning properly. This step ensures that any dirt, grime, or corrosion has been effectively removed, preserving the integrity of the internal components. Begin by inspecting each cartridge visually for any remaining residue. This includes checking the label, as discoloration or peeling may indicate excessive wear or damage.
Next, insert the cleaned cartridge into the appropriate console or handheld system. Before powering on the device, make sure that all necessary connections are secure. Upon powering on the device, observe the screen for any errors or failure to load. A successful clean is often indicated by a prompt loading screen or the game starting immediately. If the game does not load, turn off the console and remove the cartridge for further inspection.
If issues persist, re-evaluate the internal pins. Ensure they are free of any leftover debris and check for signs of corrosion. Occasionally, even with a thorough clean, a cartridge may not function properly due to damage or degradation of the internal components. If the game still fails to work, you might consider additional cleaning methods, such as using isopropyl alcohol and a cotton swab for delicate spots.
Lastly, if troubleshooting does not yield results, consulting online communities or professionals who specialize in game cartridge repairs could provide insights into potential solutions. Alternative options include using specialized cleaning kits designed specifically for game cartridges or even learning about re-soldering connections for those with technical expertise.
- Professional Design: Explore a massive game library and relive classic games with this innovative card, compatible with ...
- Strong Compatibility: Supports FAT16, FAT32 file system formats, with a maximum ROM size of 48Mbit (6Mbyte) and supports...
- Region F ree Support: Play games from all regions without restrictions. Only compatible with Japanese and European conso...
Tips for Maintaining Game Cartridges
To ensure the longevity of your valuable game cartridges, regular maintenance is essential. The accumulation of dirt and oxidation can lead to performance issues, which may hinder gameplay or even cause damage. Here are some effective tips to maintain your game cartridges over time.
First and foremost, proper storage conditions are crucial. Game cartridges should ideally be stored in a cool, dry place away from direct sunlight. This prevents moisture and heat from damaging the plastic casing as well as the internal components. Consider using protective cases or sleeves to shield the cartridges from dust and scratches. Additionally, keeping them upright in a designated storage box can help avoid any physical damage.
Another important aspect of maintenance is regular inspection of the cartridges. Every few months, take the time to check each cartridge for signs of wear or damage. Look out for corrosion or oxidation on the pins, as these can significantly impair the connection between the cartridge and console. If you notice any buildup, clean it gently using appropriate methods.
Cleaning cartridges effectively is vital. Use a soft, lint-free cloth to wipe down the exterior of the cartridges. For more thorough maintenance, a cotton swab dipped in isopropyl alcohol can be used carefully on the contacts, ensuring you do not apply too much liquid. This method removes dirt and oxidation, enhancing the longevity of your cartridges.
Moreover, playing your games regularly can help to keep the connections clean and prevent the buildup of corrosion. When games are left unused for longer periods, dirt and humidity can accumulate, leading to potential issues when you finally wish to play them again.
By implementing these maintenance tips, game cartridge collectors can prolong the life of their cherished titles while ensuring optimal performance whenever they are played.

0 Comments