Understanding the Importance of Seed Saving
Seed saving plays a crucial role in sustainable gardening and agriculture, offering numerous advantages that extend beyond the immediate benefits of cost savings. By preserving seeds from healthy, well-adapted plants, gardeners can create a cycle of self-reliance that mitigates the need for purchasing commercial seeds each planting season. This practice not only reduces expenses but also empowers gardeners to cultivate their preferred plant varieties year after year.
One of the most significant benefits of saving seeds lies in the preservation of heirloom varieties. These seeds are often passed down through generations, maintaining unique traits that are well-suited to local growing conditions. By saving these seeds, gardeners contribute to the genetic diversity of crops, which can be essential for adapting to changing climate conditions, pests, and diseases. This enhancement of plant resilience is particularly important as it fosters a robust ecosystem that can withstand environmental stresses.
Furthermore, seed saving contributes to biodiversity, a critical aspect of environmental health. Each seed variety represents a unique genetic fingerprint that can help sustain ecosystems, support wildlife, and enhance soil health. As urbanization and industrial agriculture diminish local plant varieties, saving seeds becomes an essential act of conservation, allowing gardeners to maintain a link to their cultural heritage and the natural world.
Historically, seed saving has been an integral part of agricultural practices around the globe. Many cultures have relied on this method not only for food security but also as a way to cultivate community resilience. By sharing and exchanging seeds, gardeners can foster connections with one another, building a network of support that transcends geographical boundaries. Ultimately, understanding the importance of seed saving enriches not only the gardening experience but also the broader environmental and cultural landscape.
Identifying When to Harvest Seeds
Determining the optimal time for seed harvesting is essential for ensuring the viability of seeds for future planting. The signs of seed maturity can vary across different plant species, but there are common indicators that can guide you. Understanding these indicators helps in a successful seed collection, allowing for better food growth in the next season.
One of the primary signs of seed maturity is the change in color of the seeds or seed pods. For many plants, seeds will start off green and then change to a more tan or brown color as they fully mature. It's important to observe plants closely as the color shift occurs. For example, tomatoes will turn a deep red when the seeds inside are ready, while bean pods will become dry and brown. Dryness is another crucial factor; seeds should be harvested once they are dry, as moisture can lead to mold during storage.
Another useful technique in assessing seed maturity involves testing the firmness of the seeds. For instance, seeds from annual plants, such as sunflowers or cucumbers, are typically harvested when the surrounding flower heads or pods are completely dry. In contrast, perennial plants, like strawberries or raspberries, may require seeds to be harvested after they drop naturally, which usually occurs when the fruits have fully ripened and begun to decay. The timing varies for annuals and perennials, and this awareness will aid in proper seed identification.
In sum, understanding the indicators of seed maturity such as color changes and dryness can significantly enhance the seed harvesting process. This knowledge contributes to effective food growth practices for the next planting season. The various signs observed must be taken into account, making each harvest a deliberate step towards maintaining a sustainable garden.

- Packed with Nutrients: Rich in magnesium, zinc, iron, phosphorus, vitamin E, and B vitamins for natural nutrition.
- Plant-Based Protein & Fibre: A wholesome source of plant protein and fibre for everyday use.
- Versatile Ingredient: Ideal for snacking, baking, cooking, or adding to smoothies, granola, and salads.
The Basics of Harvesting Seeds
Harvesting seeds is a vital aspect of gardening that not only allows for the continuation of plant species but also promotes sustainability and cost-efficiency. To begin the process of seed harvesting, appropriate equipment is essential. A pair of scissors, sterile containers, and a designated workspace are foundational tools. Depending on the specific plant type, garden gloves may also be useful to protect your hands during collection.
The first step in harvesting seeds is selecting the right time. Seeds should be gathered when they are fully mature; this is usually indicated by a change in color or drying of the seed pod. For instance, when dealing with vegetables like tomatoes or peppers, wait until they have fully ripened on the plant. Flowers will show mature seeds when their seed heads turn brown and begin to dry out.
When collecting seeds, it is crucial to minimize any damage to the parent plant to ensure it can continue thriving. Gently grasp the seed pod or fruit and cut it away from the main plant. Avoid any rough handling that could harm the plant or cause seed loss. For fruits like cucumbers or melons, allow them to remain on the vine until they are overripe to ensure maximum seed maturity.
Different types of plants have unique harvesting techniques. For instance, wind-dispersed seeds, such as those from dandelions, should be collected on dry days. Whereas, for more contained seeds found in pods, placing a cloth underneath the plant as you cut can catch any seeds that may drop. After collecting, it is recommended to allow seeds to dry in a cool, dry area to prevent any mold. Following these best practices ensures a successful harvesting experience and prepares your seeds for storage.

- PREMIUM BLEND: A delicious and nutritious mix of carefully selected sunflower and pumpkin seeds in a generous 250g pack
- VERSATILE USE: Perfect for snacking, baking, salad toppings, or adding to breakfast cereals and yoghurt for extra crunch
- CONVENIENT PACKAGING: Resealable pack helps maintain freshness and makes portion control easier
Cleaning and Preparing Seeds for Storage
Once you have harvested your seeds, cleaning and preparing them properly is essential to ensure their longevity and viability for the next growing season. This process involves several important steps that help prevent mold and disease, which can jeopardize your future crops.
The initial step in cleaning seeds is to separate them from any attached debris, such as plant material or soil. For larger seeds, such as beans or peas, this can often be accomplished by hand, while smaller seeds may benefit from using a fine mesh sieve. For example, you can gently shake the sieve to remove smaller particles. It's crucial to be gentle during this process to avoid damaging the seeds.
After the seeds have been separated from debris, the next step is to dry them adequately. Moist seeds can lead to mold growth, which can compromise seed viability. Spread the cleaned seeds out on a clean, dry surface, ideally in a single layer to allow for even airflow. Ensure that they are in a cool, dry place, away from direct sunlight. Depending on the type of seeds and their moisture content, this drying process can take several days to a week. To confirm that the seeds are dry, perform a squeeze test; if they feel hard and do not bend, they are ready for storage.
Finally, for certain types of seeds, a treatment may be necessary to further enhance their viability. This can include options such as soaking in a mild hydrogen peroxide solution for a short duration, which helps eliminate pathogens. Once these steps have been completed, your seeds will be well-prepared for storage, keeping them safe and ready for planting next season.
Choosing the Right Storage Containers
Selecting appropriate storage containers is essential for ensuring the longevity and viability of harvested seeds. The chosen container plays a crucial role in protecting seeds from environmental factors such as moisture, temperature fluctuations, and light exposure. To maintain optimal conditions for seed storage, it is advisable to consider a few common types of containers that provide suitable protection.
One of the most popular options for seed storage is paper envelopes. These containers are breathable, allowing for any residual moisture in the seeds to escape, thereby reducing the risk of mold. As a plus, paper envelopes are typically easy to label, providing a simple and efficient way to keep track of various seed types. However, it is important to note that they should be stored in a cool, dry place to maximize their effectiveness.
Alternatively, glass jars offer a more robust option for seed storage. Glass containers are air-tight and impermeable to light, making them an excellent choice for protecting seeds from light exposure and maintaining a consistent internal environment. They can effectively preserve seeds for several years, especially if kept in a cool and dark location. When using glass jars, it is advisable to add a desiccant packet to absorb any excess moisture present in the air, further enhancing the storage conditions.
For those seeking maximum preservation, vacuum-sealed bags represent another viable option. By removing air from the storage bag, this method significantly reduces the chances of seed deterioration caused by oxidation or moisture. Vacuum-sealing is particularly beneficial for perishable seed varieties that require extended storage periods.
Ultimately, the choice of storage container should align with the type of seeds being stored and the duration of storage. The effectiveness of these storage solutions lies in their ability to create an optimal environment, ensuring that seeds retain their viability for the next growing season.
Optimal Conditions for Seed Storage
In order to ensure the longevity and viability of seeds for the next growing season, it's crucial to create optimal storage conditions. The main factors influencing seed viability include temperature, humidity, and light exposure. By understanding these factors, you can effectively enhance the preservation of your collected seeds.
Firstly, temperature plays a significant role in seed storage. Ideally, seeds should be kept in a cool environment, typically between 32°F to 41°F (0°C to 5°C). Cooler temperatures slow down metabolic processes within the seeds, prolonging their life span. A dedicated refrigerator can be an excellent choice for storing seeds, provided that fluctuations in temperature are minimized. Avoid storing seeds in areas with frequent temperature changes, such as garages or attics.
Humidity is another critical consideration. High humidity levels can lead to seed deterioration, as excess moisture promotes mold growth and seed germination before their planned planting time. The ideal relative humidity for seed storage is generally around 20%. Using silica gel packets or other desiccants in your storage container can help maintain low humidity levels. Ensure that your seeds are thoroughly dried before storing, as this further mitigates the risk of moisture damage.
Light exposure can also negatively impact seed viability. seeds should be stored in opaque or dark containers that protect them from light, which can trigger premature germination and degrade seed quality. Using airtight containers, such as glass jars or vacuum-sealed bags, can also assist in keeping out moisture and light.
By meticulously controlling temperature, humidity, and light, you can significantly extend the viability of your seeds, ensuring a successful harvest in the upcoming season.
Labeling and Organizing Your Seeds
Effective labeling and organization of your seeds are essential steps in preparing for the next growing season. Properly labeled seeds not only simplify the planting process but also enhance tracking and managing your garden. A well-structured system can also aid in preventing the mix-up of seed types, which is crucial for maintaining desired plant varieties.
When labeling your seeds, it is vital to include specific information that will serve as a reference when you are ready to plant. Key details might include the seed type, variety, harvest date, and any pertinent growing conditions. For example, labeling your tomato seeds with "Early Girl - Harvested August 2023 - Full Sun" helps you recall the plant's fitness and growth preferences, optimizing planting success. Using durable labels that will withstand moisture, such as waterproof tape or plastic tags, ensures longevity in outdoor conditions.
Organizing your seeds can be done in various ways, tailored to individual preferences and garden layouts. Categorization by plant type is highly recommended, where seeds like vegetables, herbs, and flowers are kept in separate containers. Alternatively, you could organize seeds by harvest date, which can help streamline planting schedules for different crops. Utilizing seed storage containers such as jars, envelopes, or seed boxes labeled by category can significantly improve your seed storage routine.
In addition, consider implementing a seed inventory list. This can take the form of a simple spreadsheet or a physical notebook where you document what seeds you have, their storage locations, and planting timelines. This detailed approach allows for easy future reference and ensures you won’t lose track of your garden assets. With a systematic method in place, you are well-positioned to manage your garden effectively, setting the stage for another fruitful growing season.
Testing Seed Viability
Before planting seeds for the next growing season, it is essential to test their viability. Seed viability refers to the ability of seeds to germinate and grow into healthy plants. A simple method for conducting a germination test at home can help ensure that only the healthiest seeds are sown. This process is particularly relevant for home gardeners looking to maximize their yields from saved seeds.
To perform a germination test, gather a sample of seeds, ideally 10 to 20 seeds, from your collection. Begin by moistening a paper towel or a piece of cotton wool, ensuring it is damp but not soaking wet. Then, spread the seeds evenly on the moist surface and fold the towel or cotton over the seeds, creating a sealed environment that retains moisture. Place this setup in a warm location, preferably one that maintains a temperature of about 70°F to 80°F (21°C to 27°C).
After 7 to 14 days, check for germination. Count the number of seeds that have sprouted and calculate the germination rate by dividing the number of sprouted seeds by the total number of seeds tested, then multiplying this number by 100. For example, if 8 out of 10 seeds germinate, the viability rate is 80%. A germination rate of 75% is generally considered acceptable, while rates below this may warrant reconsidering the use of those seeds for planting.
In some cases, seeds may need specific conditions to germinate, such as exposure to light, cold stratification, or specific soil types. Documenting the conditions that favored germination will help refine future seed saving techniques. By regularly testing seed viability, gardeners can improve their planting strategies and overall garden productivity.
Tips for Successful Seed Starting
Starting seeds, whether indoors or directly in the garden, is a crucial step in preparing for the next growing season. By following certain practices, gardeners can enhance their chances of success. To begin, it's essential to prepare quality soil. Using a seed-starting mix that is light and well-draining can help ensure proper root development. This mix often contains ingredients like peat moss, vermiculite, and perlite, providing an optimal environment for seeds to germinate.
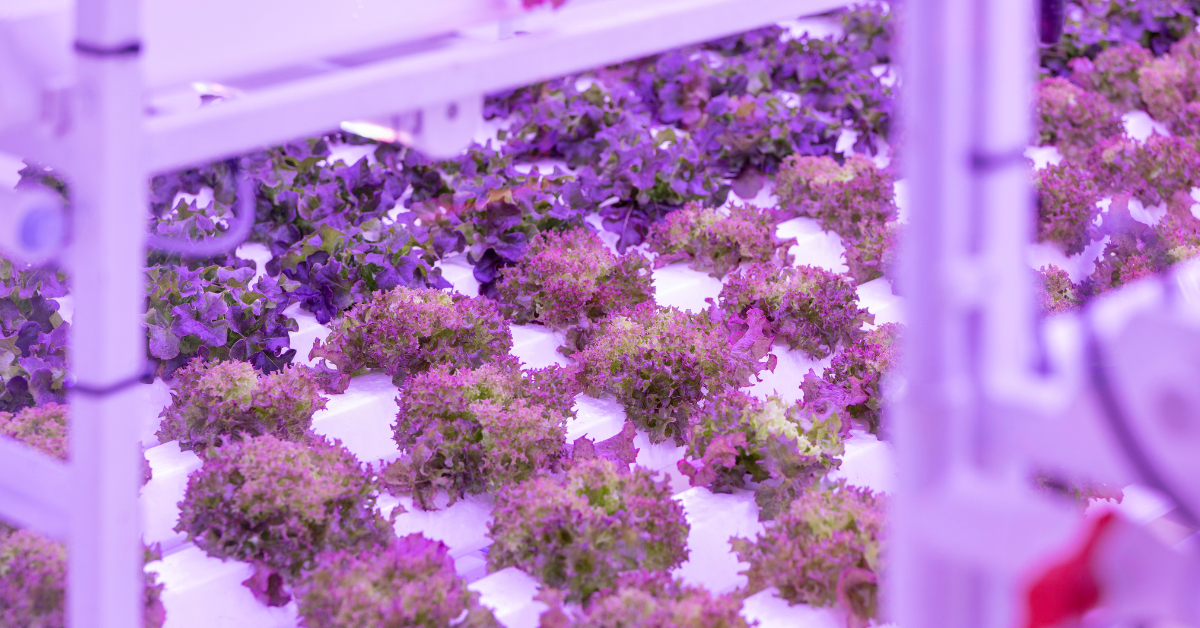
Lighting also plays a significant role in successful seed starting. For indoor seeds, utilizing grow lights that emit the full spectrum of light is advisable. Place these lights about 2 to 4 inches above the seedlings and keep them on for around 14 to 16 hours a day to mimic natural sunlight. If the seeds are sown directly in the garden, selecting a location that receives ample sunshine will support healthy growth.
Watering practices are equally important when germinating seeds. The soil should remain consistently moist, but not saturated. A spray bottle or misting technique can help water the seeds gently without displacing them from their planting sites. As seedlings emerge and grow, gradually adjusting the watering frequency based on their needs will help establish strong plants.
Transplanting techniques are also crucial to ensure that your seedlings adapt well to their eventual outdoor environment. When it’s time to transplant, hardening off the seedlings by gradually exposing them to outdoor conditions, such as sunlight and wind, can minimize transplant shock. Begin by placing the seedlings outside for a few hours each day, gradually increasing their exposure over a week or two before planting them in their final location.
By following these essential steps for soil preparation, lighting, watering, and transplanting, gardeners will be well-equipped to start their seeds successfully. A solid foundation during the seed-starting phase will contribute to a bountiful harvest in the growing season.

0 Comments